Thursday, June 13, 2013

Meatball Sandwiches


Another amazing benefit of making Baked Meatballs are the leftovers.

There's nothing quite like a hearty meatball sandwich. It's warm (which all the best sandwiches are), it's meaty and it's just a little bit messy.


Meatball Sandwich
(makes one)


2-3 Baked Meatballs
Mozzarella cheese
Good quality bread or rolls


Preheat the oven's broiler.

On a cookie sheet, line up the meatballs along the bottom slice of bread, cutting the meatballs in half if necessary. Sprinkle with mozzarella. Lay the top piece of bread beside it, open face up.

Place under the broiler until the cheese is melted and the top piece of bread is toasted. Remove from the broiler and close the sandwich.

Friday, June 7, 2013

Cheesy Artichoke Bread


If I could never eat cheese or bread again, I think I would kill myself.

I caught this show on the Travel Channel about the best restaurants in the US for cheese lovers and I couldn't believe that not a single one of them was in Southern California (I'm not counting when they went to the Thousand Oaks Melting Pot because come one, it's a chain). Worst of all, it pretty much gave me an intense craving for melty cheese and the desire for me to replace my blood with it.

So with my melty cheese craving in hand, I thought I'd try out this recipe I've had saved for almost a year. It definitely scratched that itch.


Cheesy Artichoke Bread
(recipe slightly adapted from crumb)


2 tbsp butter
1 cloves garlic, pressed
1 (14 oz) can artichoke hearts, drained and chopped
1 cup shredded cheddar and mozarella cheese blend
½ cup grated Parmesan cheese
¼ cup sour cream
Salt and freshly ground black pepper

1 small loaf of nice bread (Or a few nice rolls)


Preheat the broiler.

Slice the loaf of bread in half and arrange pieces cut side up on a baking sheet.

In a bowl, stir together the rest of the ingredients adding salt and pepper to taste. Spread the mixture evenly over each half of the loaf. 

Broil until the cheese is melted and the bread is hot. Cut into pieces and serve warm.

Tuesday, June 4, 2013

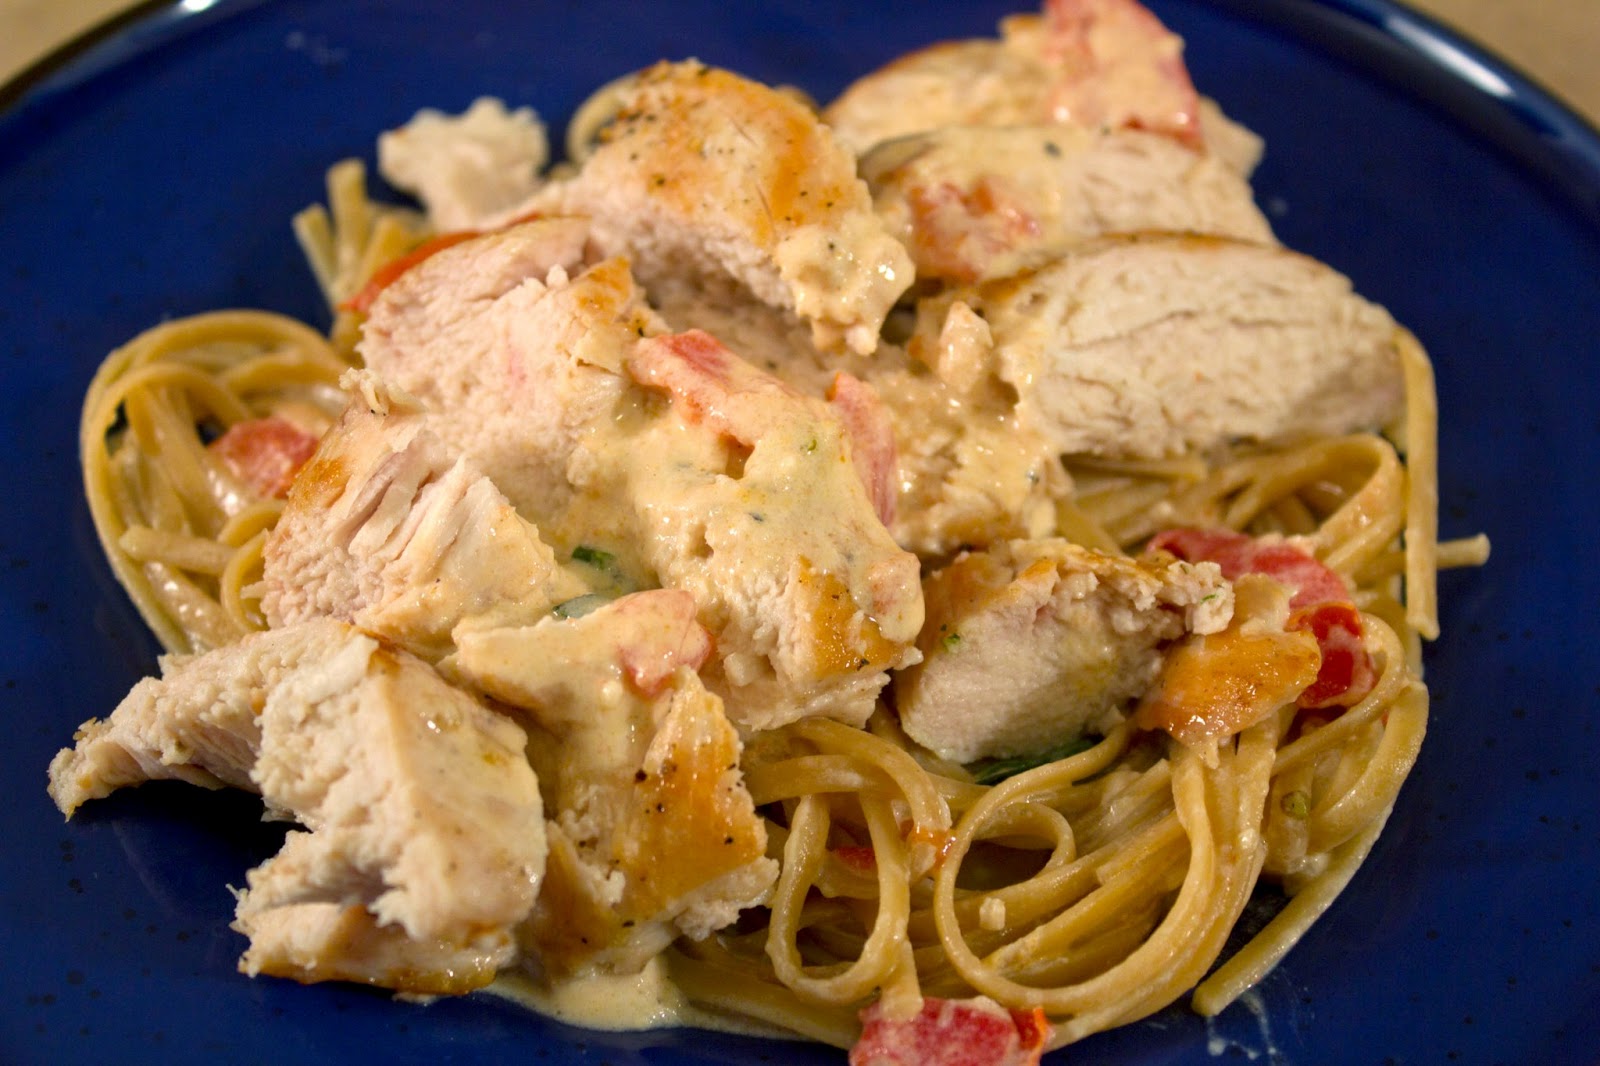
Tomato Basil Chicken and Pasta


Have I mentioned before that I love cream sauces? Yes? Constantly? Ah well, let me say it again: I really really love cream sauces.

In execution, this dish is very similar to the Lighter Cajun Chicken Pasta that I cook about once a week. The flavors are just a tinge more Italian. And just like the Cajun Pasta, for a richer sauce, use more or all heavy cream in place of the whole milk. 


Tomato Basil Chicken and Pasta
Serves two


2 chicken breasts pounded to an even thickness
1 tablespoon olive oil
3 oz whole grain pasta
a couple of fresh basil leaves
1 ripe tomato, cut into chunks
1 clove of garlic, finely minced
1/4 cup heavy cream
3/4 cup whole milk
1/4 cup grated Parmesan cheese
Salt and pepper to taste


Preheat the oven to 350 degrees. 

Season the chicken breasts with salt and pepper on both sides. Cook pasta according to package directions and drain.

In a large non-stick skillet, heat the oil with a few shreds of basil. Lay the chicken down in the pan and cook for 3 minutes. Flip and cook another 3 minutes. Transfer the chicken to a rimmed baking dish and place in the oven for 12-15 minutes or until cooked through.

In the pan the chicken was cooked in, toss the tomatoes over medium heat until they begin to soften. Add the garlic and stir. Once the garlic is fragrant but not browned, pour in the cream and milk. Shred some more basil leaves into the sauce and add salt and pepper to taste.

Reduce over medium heat until the sauce begins to thicken, about 5-8 minutes. Stir in the Parmesan cheese until melted and fully incorporated before turning off the heat.

Toss the cooked pasta in the sauce and serve topped with sliced chicken. Pour any remaining sauce over top.

Monday, June 3, 2013

Baked Cheddar Cheesy Straws


I've never tried to make anything like a cracker before and admittedly I was a little apprehensive to try out this recipe. After grating almost a whole cheese block and adding little more than a tiny bit of butter, flour and seasonings, I half expected to open the oven onto a gooey, cheesy mess.

But let me just say it right now, these were so easy and they turned out so tasty.

Not to mention they look pretty classy for a snack thrown together in less than half an hour. The red pepper flakes give them a surprising kick, but the spiciness was pleasant in my opinion. If you like things more mild, I suggest cutting down on the measurement.

I have a feeling I might be experimenting more with different flavors of cheeses and herbs but these were a tasty start.


Baked Cheddar Cheesy Straws
(recipe from Alexandra's Kitchen)


6 oz grated Sharp Cheddar Cheese
4 tablespoons butter
3/4 cup flour
1/2 teaspoon kosher salt
1/2 teaspoon red pepper flakes
1/4 teaspoon fresh ground pepper
1 tablespoon milk


Preheat the oven to 350 degrees.

In a food processor, combine the cheese, butter, flour and seasonings with short pulses. Process until the mixture resembles coarse crumbs and pour in the tablespoon of milk, pulsing until the dough comes together.

On a flat, lightly floured surface (I like to use the parchment paper I'm going to bake it on) roll out the dough into a rectangle using a lightly floured rolling pin. Roll it out evenly until the dough is about 1/8 inch thick.

Using a pizza cutter, slice the dough into thin strips, separating each slice so they won't stick together. Lay the parchment paper onto a baking sheet and bake in the oven for 12-15 minutes or until the edges are just beginning to brown. 

Allow to cool before serving.

The straws will keep in a sealed container in the refrigerator for up to two days but taste best the day of being baked.


Sunday, June 2, 2013

Baked Meatballs


Over the last couple of years, I've learned how to make a few (slightly) impressive meals: fancy cream sauces or chicken stuffed with cheeses. But sometimes I just want a simple classic and that's when I crave spaghetti and meatballs.

Meatballs, at least in my experience, are deceptively complex. Somehow I never got them right. Cooking them like my dad would (in a pan over the stove) left them unevenly cooked and not even remotely round. It drove me crazy.

So of course Alton Brown, my cooking hero, found the best way to cook meatballs ever. It takes a tiny bit longer since they are baked in the oven, but holy crap it is worth it. Perfectly cooked, perfectly round, and so freaking delicious, these babies are a favorite around my kitchen. 

The best thing to do with the leftovers: Meatball Sandwiches of course!


Baked Meatballs
(Recipe slightly adapted from Alton Brown's Good Eats)


1 pound ground beef
1 egg
1/3 cup grated Parmesan
1/2 cup Italian bread crumbs, divided
1/4 teaspoon dried basil
1/4 teaspoon dried oregano
1/4 teaspoon red pepper flakes
1/2 teaspoon garlic powder
1/2 teaspoon kosher salt


Preheat the oven to 400 degrees. Spray a mini muffin pan with non-stick spray and set aside.

In a large bowl, combine the ground beef, egg, Parmesan, 1/4 cup of the bread crumbs, and the seasonings (I find nothing works better than your hands for this step). Mix them all together until fully incorporated.

Pour the remaining 1/4 cup of breadcrumbs into a small bowl. 

Using a 1.5 ounce scooper (an ice cream scoop is usually about the right size if you don't have a fancy scooper), measure out the meat mixture and roll each scoop into a round ball. Roll each ball into the bread crumbs, coating the exterior entirely and place each ball into a cup in the mini muffin pan. Repeat with all the meat mixture.

Place the muffin tin on a baking sheet to catch any drippings and bake in the oven for 20 minutes.

Friday, May 31, 2013

Pan Seared Steak


I love steak, but sometimes cooking it can get a little tricky. Since I live in a tiny apartment with the barest ledge of a balcony, there's no way to grill up steaks the way my dad does back home, and for a long time I struggled with how to cook them.

For some reason they always turned out dry and it drove me totally crazy. I hate when restaurants can do something that I can't do myself. And then a couple of years I stumbled upon this tip and I've been cooking up delicious steaks this way ever since. Hell, screw the grill, this is even better.

Everyone has their own favorite steak seasoning, but my go to is Grill Mates Montreal Steak Seasoning. I put this stuff on everything: meat, vegetables, even in my stew. Sometimes I just open it up and sniff it, which I know sounds crazy, but it smells so divine.

For your convenience, here's a little chart about internal temperatures and done-ness. I always use a thermometer because it's the easiest way to insure a perfectly cooked steak.

140 degrees        Rare
150 degrees        Medium Rare
160 degrees        Medium
165 degrees        Medium Well
170 degrees        Well


Pan Seared Steak
Serves two


2 steaks, room temperature
1 tablespoon olive oil
seasoning


Preheat the oven to 400 degrees. Coat both sides of the steaks with your preferred seasoning.

Pour the olive oil into a pan that is stove and oven safe (I always use my trusty cast iron skillet for steaks). Put it over high heat. 

Once little whisps of smoke start to appear, lay the steak on the pan, letting it sit untouched for three minutes before flipping. For best results try to lay the uncooked sides of the steak onto fresh areas of the pan where the heat is most intense.

After another three minutes, turn off the stove and place the whole pan into the oven for 12-17 minutes, depending on how well done you like your steak.

Allow to rest 2-3 minutes before serving.

Thursday, May 30, 2013

Oreo Martini


My leading man really has a thing for cookies and cream flavored things. It's his favorite shake flavor and it what he always makes at every frozen yogurt place in town. So when I saw the recipe for this drink, I knew he'd be sold. 


This thing is so sweet, it could be served for dessert. I made it in bulk form as I was mixing it up for a large group of people and that's the recipe listed below, but if you are looking to make a single glass, I suggest using the ratio from over at Snappy Gourmet

And while the garnish is by no means absolutely necessary (and honestly half the time I skip right past making things look nice in favor of wanting to drink), it really does turn this martini into something super cute and impressive.


Oreo Martini
(recipe from Snappy Gourmet)
Serves a crowd or a few heavy drinkers

For Martini:
1 Package of Jello-O Oreo instant pudding
1 cup whipped cream flavored vodka (Pinnacle is always my favorite)
1 cup whole milk

For Garnish:
Chocolate Syrup
Crushed Oreos
Whipped Cream
Mini Oreos


In a punch bowl, whisk together the Jell-O, vodka and milk. Allow to sit at least five minutes, whisking occasionally. The Pudding won't necessarily set but it will thicken.

While the drink thickens, coat the edge of a martini glass with chocolate syrup, then dip the edge into the crushed Oreos. Using a ladle, pour the martini mixture into the glass and top with whipped cream and a mini Oreo.


Tuesday, April 23, 2013

Cajun Seasoning Mix


It wasn't until very recently that I came to appreciate the complexity of Cajun flavoring. Growing up, spicy food was just about unheard of around the dinner table. The first time I tried Chipotle I thought my tongue would set on fire.

Now I'm no stranger to heat though I still like spicy to be a subtle hint of flavor instead of a completely overwhelming factor of the meal. I'm very glad my taste buds weren't burnt out while I was still young. I know a few too many people who have to douse their food in hot sauce to taste it.

This spice mix is just the right amount of heat and flavor. There is a slight spiciness to it but it's also has a nice herb-y flavor. 

My favorite use for this is my Lighter Cajun Chicken Pasta recipe, but its super versatile. Lately I've been considering mixing it into some burger meat for a bit of a twist on my standard hamburger seasoning.


Cajun Seasoning Mix
(Recipe slightly altered from allrecipes)


2 1/2 teaspoons paprika
2 teaspoons salt
2 teaspoons garlic powder
1 1/4 teaspoons dried oregano
1 1/4 teaspoons dried thyme
1 teaspoon ground black pepper
1 teaspoon onion powder
1/2 teaspoon cayenne pepper
1/2 teaspoon red pepper flakes


Combine and store in an airtight container (I like a mason jar). 


Wednesday, April 17, 2013

Easy Chicken Parmesan


Chicken Parmesan was one of the first dishes I attempted to cook once I'd moved out on my own, and one that I hadn't properly mastered until just now thanks entirely to Skinny Taste

The recipes I had tried before were a little...excessive. You'd have to pre-fry the chicken on the stove and the chicken was doused in a huge amount of sauce that just made everything soggy. None even came close to the crispy, restaurant style chicken parm I wanted.

But this recipe was totally different. Baked in the oven, it isn't as fat heavy as other, pan fried versions and with just a couple spoonfuls of tomato sauce spread on top in the last few minutes of cooking, sogginess is a thing of the past.

I like laying on a nice slice of mozzarella instead of using the shredded cheese the original recipe uses but that is entirely up to your preference or whatever you have in the fridge. It also neatly seals the marinara onto the chicken in a delicious cheesy force field.


Easy Chicken Parmesan
Serves two
(recipe from Skinny Taste)


2 skinless chicken breasts
1/4 cup Italian seasoned bread crumbs
1/4 cup grated Parmesan cheese
Salt and Pepper
1 tablespoon butter
2 slices mozzarella cheese
1/4 cup marinara sauce


Preheat the oven to 400 degrees. Lightly grease a baking sheet with non-stick spray.

Lay the chicken breasts between two pieces of plastic wrap and pound until even thickness throughout.

On a plate, combine the bread crumbs, Parmesan cheese and a sprinkling of salt and pepper. Melt the butter in a bowl.

One breast at a time, dip the chicken into the melted butter then lay into the breadcrumb mixture, coating both sides. Place the breaded chicken breast onto the prepared baking dish and repeat with the remaining breast.

Once both pieces of chicken are breaded, bake in the oven for 10 minutes. Flip the chicken and bake for another 10 minutes. Pull the chicken out of the oven and spread 2 tablespoons of marinara sauce over each breast, topping the sauce with one slice of mozzarella cheese.

Return the chicken to the oven for 5 minutes or until the cheese is melted.

Tuesday, April 16, 2013

Butternut Squash Macaroni and Cheese


I had never tasted squash until last Christmas when my sister made butternut squash raviolis with a brown butter sage sauce. I had no idea it was so tasty. As a side note now I am utterly hooked on squash ravioli.

It was my new interest in squash that made me particularly interested in this infographic from The Vegan Stoner. I altered it a bit considering I am not vegan and I love cheese, but it is a very similar premise. If you have any favorite pairing of spices with squash, it would be easy (and delicious) to throw in some of those as well.


Butternut Squash Mac and Cheese
(recipe inspired by The Vegan Stoner)
serves two


4 oz whole grain pasta
1 package of frozen squash puree, thawed in the microwave
1/4 cup grated Parmesan 
1 tablespoon half and half
1 tablespoon butter or margarine
salt and pepper


Cook pasta according to package direction. Drain and return to pot.

In a small skillet over medium heat, melt the butter or margarine (I like margarine for this because it's less likely to burn and I prefer the flavor). Keep it over medium heat as it bubbles and turn of the heat once it browns.

In a large bowl, stir together the squash puree, Parmesan, half and half, and the browned butter, as well as salt and pepper to taste. Stir in the cooked pasta and serve with a sprinkling of Parmesan.

Monday, April 15, 2013

Chocolate Marshmallow Martini


Craving something chocolatey? Something sweet? Then I've got just the right drink for you.

This thing tastes like candy, and even though it has a relatively high alcohol content, the marshmallow flavored vodka covers up the sting of hard alcohol. Overall, the taste reminds me of those chocolate covered marshmallow eggs you get for Easter. 


Chocolate Marshmallow Martini


1.5 ounces marshmallow flavored vodka
1.5 ounces chocolate liqueur
a splash of half and half (or milk to be on the lighter side)


Shake all ingredients over ice and strain into a martini glass. Sprinkle with cocoa powder and miniature marshmallows for garnish (optional).


Sunday, April 14, 2013

Chicken Pesto Provolone Panini


I don't think I could ever get sick of a nice hot sandwich.


Chicken Pesto Provolone Panini
Serves two


4 slices of good, thick bread
2 slices provolone cheese
Chicken deli meat
Pesto
Butter


Heat your sandwich press according to appliance instructions.*

Butter one side of each slice of bread. On the other sides, spread a generous amount of pesto.

Layer the chicken slices even across each sandwich and top with a slice of Provolone. Close the sandwich, pesto sides in, butter sides out, and cook in the panini press until to top is golden the inside of the sandwich is warmed.

*If you don't have a panini press, you could easily warm this sandwich up on a non-stick skillet in the same way one would make a grilled cheese: cook on one side for 1-2 minutes and flip. Cook another 1-2 minutes and serve.


Friday, April 12, 2013

Alton Brown's Oven Roasted Broccoli


I've never been the biggest fan of vegetables, nor a great advocate for any veggie side dish, but let me tell you, this stuff is great. Not that it should come as any surprise, after all, Alton Brown is a food genius. 

But seriously, if you are going to master one veggie, let it be this. It's so ridiculously easy to pull together, it's hard to believe it tastes so good. I've even made it for parties. And I'm not talking fancy pot luck dinner parties but rather the drunken crazy parties you usually don't remember. Except everyone remembered the broccoli. (Plus it passed the Can Make When Drunk Test which is pretty handy.)

Overall, I highly suggest this recipe to veggie lovers and non-veggie lovers alike. 


Alton Brown's Oven Roasted Broccoli
(Recipe from Good Eats)


1 pound broccoli, rinsed and cut into bite size pieces
2 tablespoons olive oil
2 cloves garlic, finely diced
1/3 cup panko bread crumbs
1/4 cup shredded Parmesan
Salt and Pepper to taste


Preheat the oven to 425 degrees.

In a large bowl, stir together the broccoli, olive oil, garlic, salt and pepper.

Spread the Panko out onto a cookie sheet and place in the oven for 2 minutes or until the crumbs turns golden brown. Remove from the oven and stir into the broccoli mixture until combined.

Pour all the broccoli mixture out onto the cookie sheet and spread evenly. Roast in the oven for 8-10 minutes or until broccoli is tender. Once cooked, return back to the bowl and stir in the Parmesan. Serve immediately.


Thursday, April 11, 2013

Pizza Dip For Two


Yet another dip. I really wasn't kidding when I said I was addicted.

This dip, in my mind, is the slightly lazier version of the White Pizza Dip for Two I made a couple of months back. It takes just a few minutes to whip up and it includes some marinara sauce, something my leading man can never get enough of. 

The nice thing about it is you can top it with any of your favorite pizza toppings. I kept mine simple but some pepperoni laid out on top would have been nice too.


Pizza Dip For Two
(recipe adapted from Closet Cooking)


2 oz (1/4 a block) of cream cheese
1/2 cup shredded mozzarella cheese, seperated
2 tablespoons sour cream
A pinch of both basil and oregano
1/3 cup marinara sauce


Preheat the oven to 350 degrees.

In a small bowl, stir together the cream cheese, 1/4 cup of the mozzarella, the sour cream and the herbs. Spread the mixture evenly across the bottom of a 14 oz ramekin.

Pour the marinara sauce over the cream cheese mixture and spread it out evenly with the back of a spoon. 

Sprinkle the remaining 1/4 cup mozzarella cheese over the top and bake in the oven for 15 minutes or until the cheese is melted. For extra brown-ness, pop it under the broiler for 1-2 minutes or until desired brown-ness is achieved.


Wednesday, April 10, 2013

Brown Sugar Bacon Chicken


I'm pretty sure bacon is the food of the gods. 'Wrapped in bacon' brings everything to a whole new level and add 'rolled in brown sugar' to the mix and I'm pretty sure I just had a food orgasm.

My leading man really loved this dish. It has just a hint of sweet and spicy, and of course the delicious smokey flavor of bacon. And according to my calculations, it clocks in under 300 calories, even though it is coated in brown sugar.


Brown Sugar Bacon Chicken
(recipe from Diary of a Recipe Addict)
Serves two


2 skinless chicken breasts
4 slices of bacon (Thick Cut Applewood Smoked is our absolute favorite)
salt, pepper and chili powder
2 tablespoons brown sugar, divided


Preheat the oven to 400 degrees. Line a baking sheet with parchment paper.

If using thick cut bacon, fry up the four slices in a non-stick pan until just beginning to brown. (If using thin sliced bacon, you can skip this step.) Remove from the pan onto a plate lined with a paper towel and set aside.

Sprinkle both sides of the chicken breast with salt, pepper, and a dash of chili powder. Wrap each breast with two slices of bacon and lay onto the prepared baking dish. Measure out 1 tablespoon of brown sugar onto each wrapped breast and rub the sugar into the bacon.

Bake in the oven for 30 minutes or until chicken is cooked through.


Tuesday, April 9, 2013

Individual Ravioli Lasagnas


Lasagna was the first real meal I ever learned to cook. Lasagna is, after all, the ultimate throw together meal. With no bake noodles, it gets even easier. And for how simple it is to make, it still makes an impression.

The problem with lasagna is that it feeds a flipping army. Even when company is over, there is always, always leftovers. Most the time, there's so much leftover that the only way to finish it all is to eat it every day for a week and where's the fun in that? 


That's where these individual ravioli lasagnas come in. The raviolis make them super diverse and even easier to toss together because you don't have to figure out how to fit huge rectangular noodles into a 14 oz ramekin.


This is the recipe for one individual ravioli lasagna but the portions are easy to scale up for as many as you need.


Individual Ravioli Lasagnas
Recipe makes one serving


6-8 refrigerated or frozen ravioli (Meat works best)
3/4 cup marinara sauce, divided
1/3 cup ricotta cheese
1/2 cup shredded mozzarella, divided
1/4 cup spinach, fresh or frozen


Preheat the oven to 350 degrees. Spray a 14 oz ramekin with non-stick spray.

In a bowl, stir together the ricotta, 1/4 cup of the mozzarella, and the spinach. Set aside.

Spread 1/4 cup of the marinara sauce across the bottom of the ramekin. Arrange half the raviolis on top of the sauce and spoon half the ricotta mixture on top of that. 

Pour another 1/4 cup of sauce on top of the ricotta and layer the remaining raviolis evenly across. Spoon the remaining ricotta mixture on top of the raviolis, pour on the last 1/4 cup marinara, and sprinkle the reserved 1/4 cup shredded mozzarella on the very top.

Cover the ramekin with foil and place in the oven for 30 minutes. (If you are cooking more than two, increase the cooking time to 40 minutes)

After 30 minutes, remove the foil and bake for another 10 minutes or until the cheese is melted and beginning to brown.

Cool for at least 5 minutes before serving.


Monday, April 8, 2013

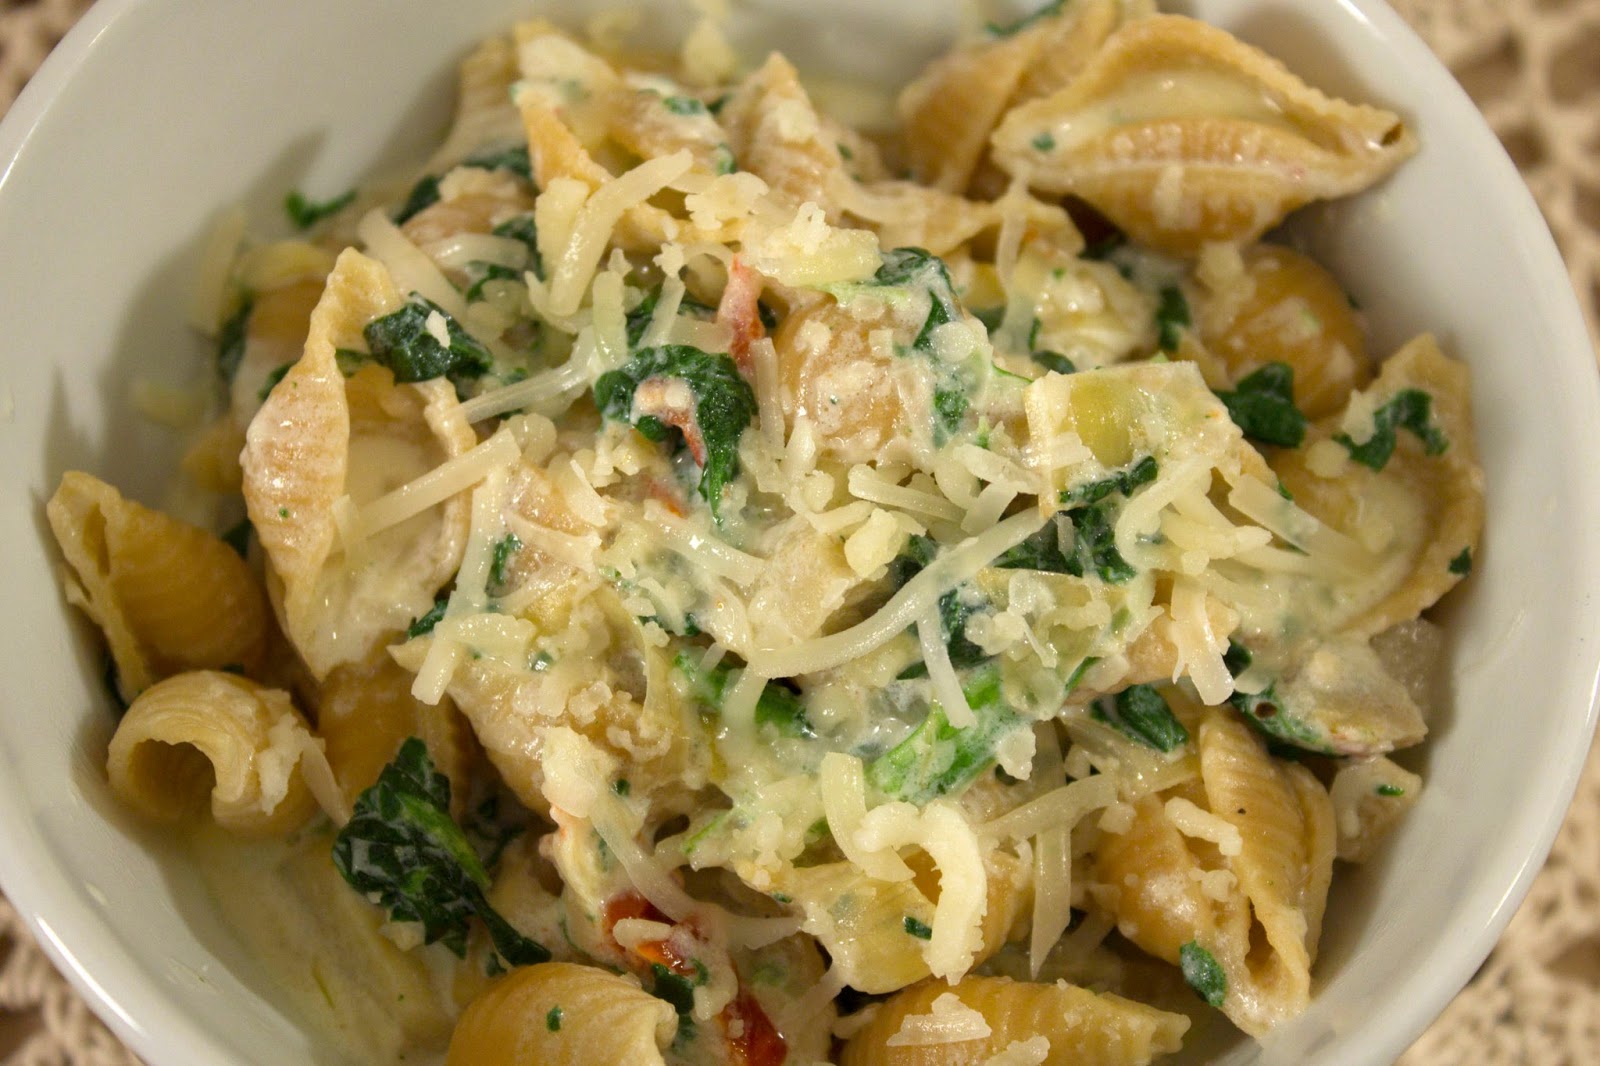
Spinach Artichoke Dip Pasta


It's been a while since I've had a chance to post. I've been so busy with a freelance visual effects gig for a short film that my apartment and my diet were completely upended. But now I've got some time back on my hands and that means there's time to cook!

I'm pretty sure spinach artichoke dip is my ideal format for eating vegetables. It might have something to do with the creamy sauce. After all, cream makes everything taste amazing.


But spinach artichoke dip isn't a proper meal, at least not according to my leading man, (I strongly disagree) so why not take the basic premise of my Spinach Artichoke Dip for Two and stir it into some pasta? It made a delicious meal and best of all, it was under 400 calories. I have a hard time complaining about that.


Spinach Artichoke Dip Pasta
Serves two


4 oz whole grain pasta (I used medium shells)
1/2 cup half and half
1/2 cup whole milk
1 tablespoon butter
1/4 cup spinach, fresh or frozen
2 artichoke hearts from a can, finely diced
2 sun dried tomatoes, finely diced
1 clove of garlic, finely diced
1 teaspoon salt
1/4 teaspoon ground pepper
two tablespoons grated Parmesan


Cook pasta according to package directions and drain.

In a small saucepan, heat the half and half, milk and butter over medium-low heat until the butter is melted and the milk just begins to steam.

Toss in the spinach, artichokes, tomatoes, garlic, salt and pepper and heat until the sauce begins to thicken. Stir in the Parmesan until completely melted and pour the sauce over the drained noodles. Stir to coat evenly.

Garnish with more grated Parmesan and serve.


Friday, March 29, 2013

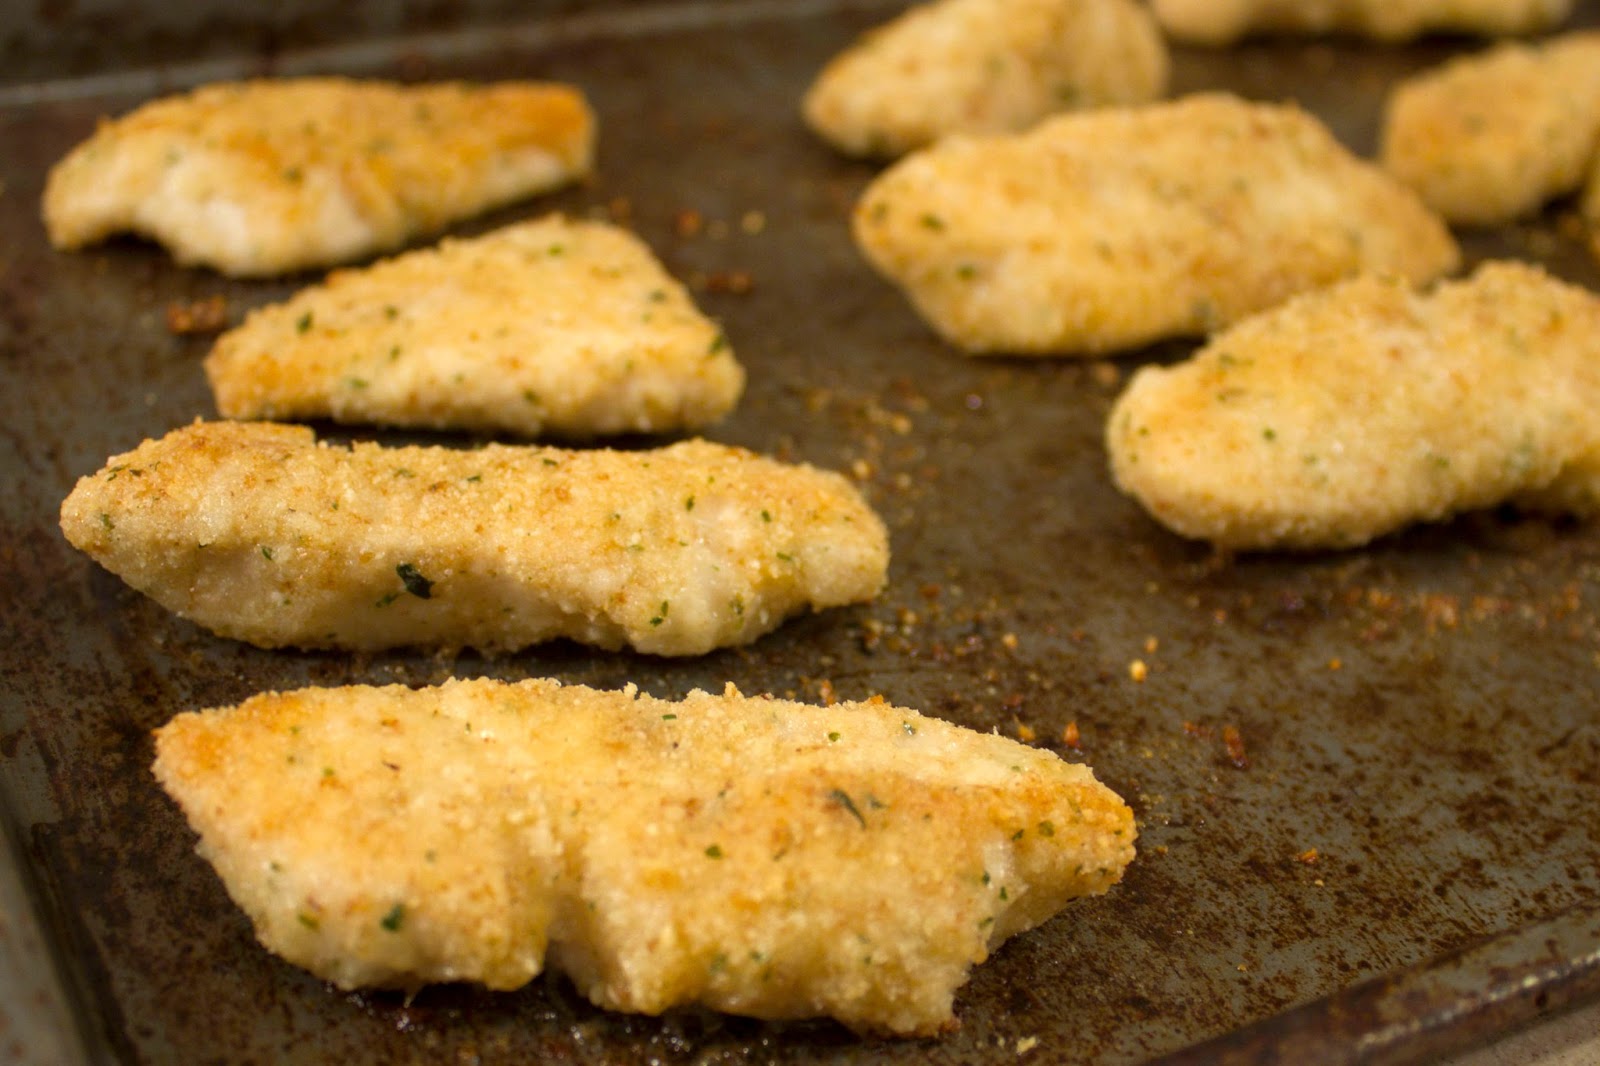
Breaded Chicken Strips


This recipe is a fail proof classic. My family has been making this chicken for at least a decade, but we call it Friday Chicken, named after the woman who gave us the recipe.

It's a simple recipe and a simple meal, but it wins over just about anyone who will eat chicken. Of all the gorgeous meals I cook for my leading man, this he requests most often. We like to serve it with some Rice-A-Roni, the most simple of side dishes, and it is delicious every single time.


Breaded Chicken Strips
serves two


2 skinless chicken breasts slices into strips
2 tablespoons butter
1/3 cup Italian seasoned bread crumbs
1/3 cup grated parmesan cheese
1/2 teaspoon salt
A pinch of pepper


Preheat the oven to 400 degrees. Spray a cookie sheet with non-stick cooking spray.

In one bowl, combine the bread crumbs, cheese, salt, and pepper and stir with a fork. In another bowl, melt the butter. 

With one piece at a time, dip a chicken strip into the melted butter and then into the breadcrumb mixture, coating the chicken. Place breaded chicken on cookie sheet and repeat the process with the rest of the chicken.

Bake chicken in the oven for 15 minutes, flipping the chicken halfway through. 


Thursday, March 28, 2013

Easy Bruschetta Chicken Pasta


If there's one thing I really love about this dish, it's the simplicity of it. Especially when the final product doesn't taste like a meal slapped together when in all honesty, that's pretty much what it is. 


Red sauce isn't really my absolute favorite, but when combined with the reduced balsamic glaze, it gets an extra little kick.


Easy Bruschetta Chicken Pasta
Serves two


2 skinless chicken breasts
3 oz whole grain angel hair pasta
1/2 cup marinara sauce
2 oz mozzarella pearls
1/3 cup balsamic vinegar


Cook the chicken in whatever way is your favorite. (I like to salt and pepper the breasts, fry them in a non stick pan for three minutes on each side, and then place in a 350 degree oven for another ten minutes.) Slice the cooked chicken into strips

In a small saucepan, heat the balsamic vinegar over medium low heat until reduced by half, about 15-30 minutes. Remove from heat and allow to cool.

Cook the pasta according to package directions and toss with the marinara, mozzarella pearls and the sliced chicken. Drizzle the balsamic glaze over the pasta and serve.


Saturday, March 23, 2013

Pineapple Upside Down Cake Martini


Apparently three of my last four posts have been booze. Whoops.

If you aren't much of a fan of the taste of alcohol, I highly suggest you give this drink a try. It seriously tastes like the liquid version of pineapple upside down cake. It's amazing. 

I think using the syrup from a jar of maraschino cherries makes all the difference. Grenadine always tastes a little too much like cough syrup but the maraschino cherry juice really completed to whole pineapple upside down cake flavor.


Pineapple Upside Down Cake Martini


1 shot cake flavored vodka
2 shots pineapple juice
A dash of syrup from a jar of maraschino cherries
1 maraschino cherry for garnish


Pour the vodka and pineapple juice into a shaker filled with ice. Shake and strain into a martini glass. Pour the cherry syrup into the glass and allow to settle onto the bottom. Garnish with a cherry and enjoy.


Sunday, March 17, 2013

Copy Cat Tiki Tiki Tiki Tiki Tiki Rum


There are a lot of benefits to living in Southern California. The sun is perpetually shining, palm trees line the streets, and Trader Sam's makes every other bar on the planet look like a bingo game at the senior center.

If you've never been to Trader Sam's, located at the Disneyland hotel, you are missing out. It's packed with all the fun of Disneyland with the added bonus of alcohol. While you sip tropical treats, the room comes alive. I won't spoil anything, but I highly recommend ordering the Ship Wreck on the Rocks. It's comes with a pretty cool little spectacle.

The Tiki Tiki Tiki Tiki Tiki Rum is my personal favorite on their menu, and yes, you have to say the all the Tiki's. It's a bit of a spin on a pina colada, but way tastier. 


Copy Cat Tiki Tiki Tiki Tiki Tiki Rum
(based on Trader Sam's awesome drink)


1 1/2 shots coconut rum (I like Malibu Black)
1/2 shot orange juice
1 1/2 shot pineapple juice
1 shot cream of coconut*
Dash of cinnamon and nutmeg


Mix rum, juices and cream of coconut in a shaker with ice. Pour into a glass, top with shaved ice and sprinkle with cinnamon and nutmeg. 

(Don't skip the spices, it's what makes the drink exceptional!)

*A note about Cream of Coconut: Cream of Coconut generally comes in a can and is available in most grocery stores. In my local Ralph's, I found it in the liqueur aisle near the drink mixes.

If you open up the can and you see a thick, chunky paste, don't worry, it was just stored some place cool enough to separate. Just fill up a bowl with warm water and rest the can in the water, making sure no water spills over the open edge. Let it warm for five minutes, stirring occasionally, until it becomes a semi-opaque liquid.  

Friday, March 15, 2013

Pistachio Shamrock Spritz Cookies


St. Patrick's Day is getting close! What's not to love about a holiday that most devote to drinking?

It's times like these that I miss living in Chicago. No one does St. Paddy's Day so well. They dye the river green. It's pretty cool.


But anyways, I always love festive treats, and these were extra fun because they gave me an opportunity to use the cookie press I've had sitting around here for a while. 

Spritz cookies were a staple of my childhood. We'd make trees and wreaths for Christmas every year. The weird thing is, for some reason, we just haven't had as much luck with them the last few years. 

The dough wouldn't stick to the pans and they'd get pretty burnt on the bottom. Worst of all, using parchment paper was impossible for some reason and I heavily depend on that stuff for easy clean up. 

After doing some research, I've found some tips that make the whole ordeal significantly more successful. Plus I added some ground pistachio flour to the mix to create a more complex flavor.

P.S. sorry about the weird measurement of egg. This is technically a half batch but I didn't really need to make 80 cookies. 


Pistachio Shamrock Spritz Cookies
(adapted from Wilton)
Yields about 40 cookies


3/4 cup butter, softened.
1/2 cup sugar
2 tablespoons beaten egg
1 tablespoon milk
1/2 teaspoon vanilla extract
1 cup pistachio flour*
3/4 cup all purpose flour
1/2 teaspoon baking powder
Green Food Dye


Preheat the oven to 350 degrees. (350 if you have dark cookie sheets, closer to 375 if you have light cookie sheets)

Fit parchment paper onto two cookie sheets. Place the cookie sheets with the parchment paper in the freezer.

In the bowl of an electric mixer, cream butter and sugar until light and fluffy. Add the egg, milk and vanilla and mix well.

Slowly beat in the pistachio flour, all purpose flour, baking powder and a few drops of green food dye until combined. DO NOT CHILL.

Fit a cookie press with the desired pattern, shamrocks in this case. Using a spatula, fill the cookie press with dough. Pull the chilled cookie sheets out of the freezer and press dough onto the parchment paper holding the paper down around the press as you pull up. Give the cookies at least an inch and a half of space for room to expand.

Bake in the oven for 8-10 minutes or until edges are lightly browned. Cool 5 minutes on the cookie sheet then transfer to a cooling rack. Decorate with icing and sprinkles.


* In theory, pistachio flour could be bought already ground, but I always make my own. 

I buy shelled pistachios, generally from a canister, and rinse the salt off using a strainer. I lay them out on a cookie sheet and let them air dry a few hours, then pop them in a 350 degree oven for five minutes.

Cool completely before grinding in a food processor using short pulses. Sift the ground pistachios and the result is homemade pistachio flour.